Shading Corrections
Shading correction can adjust image inconsistency, generally seen on the edges, due to illumination and background inhomogeneity. This is achieved by subtracting data from a blank image from the current image.
Consider the following image of kidney stained with H&E (left) and an image of just a blank part of the slide (right):
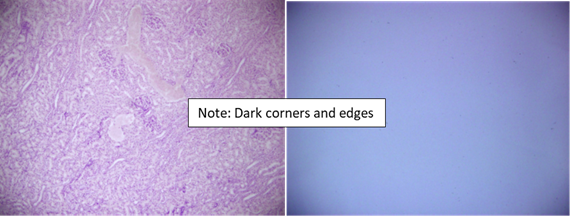
The information about the illumination and background inhomogeneity from a blank image can be used to correct the brightfield H&E image.
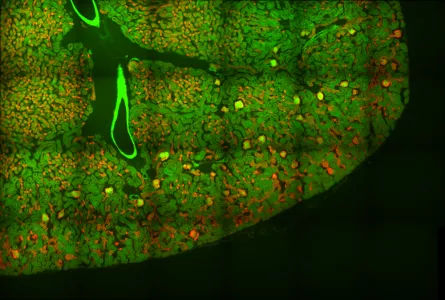
This image inconsistency is most evident on a tiled image spanning a large area as the edges along where the images are stitched become obvious even when the image is aligned correctly.
Example of a tiled image without shading correction
And the same tiled image with correct shading correction
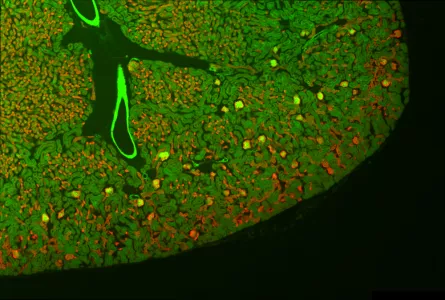
(images from http://nic.ucsf.edu/blog/2014/01/shading-correction-of-fluorescence-images/)
Notes before collecting the shading correction image
- Ensure you have set up your microscope for Kohler illumination.
- Shading correction has to be performed on every objective you use as the optical aberrations will be different for each objective.
- Acquire shading images using the same magnification and binning as the sample images.
- Most of the objectives in the IMB microscopy facility are Plan Apochromat objectives which have flat-field correction and low distortion. But you may need different shading images for each fluorescent wavelength if you are acquiring images of multiple fluorochromes (or from an RGB camera). It is your responsibility to check the quality of your images. To collect flatfield images for fluorescence imaging, you’ll need to use a separate sample that is evenly fluorescent, e.g. 1mg / mL fluorescein in between a slide and coverslip. We have evenly fluorescent plastic slides at the microscopy facility and we can assist you in collecting flatfield images.
We recommend you do this at the beginning of each imaging session
to get the best quality image
First, move to a blank portion of your slide that is clear of any sample/tissue or debris. You may need to move the image out of focus to achieve this.
How to do shading correction in:
Leica Las X
Zeiss blue/black
- Click on the Snap button to acquire this position as the shading correction reference image.
- Under Processing Tab > Adjust > Shading correction
-
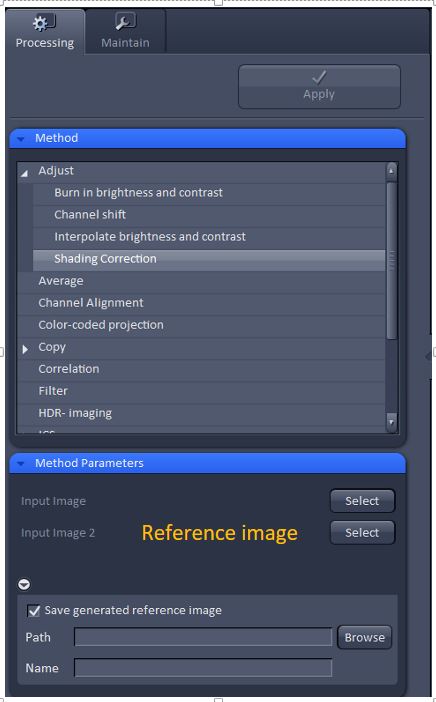
- Select the shading correction reference image from the dropdown list and apply this image.
- Save the shading correction reference image and it will be applied directly to your live imaging.
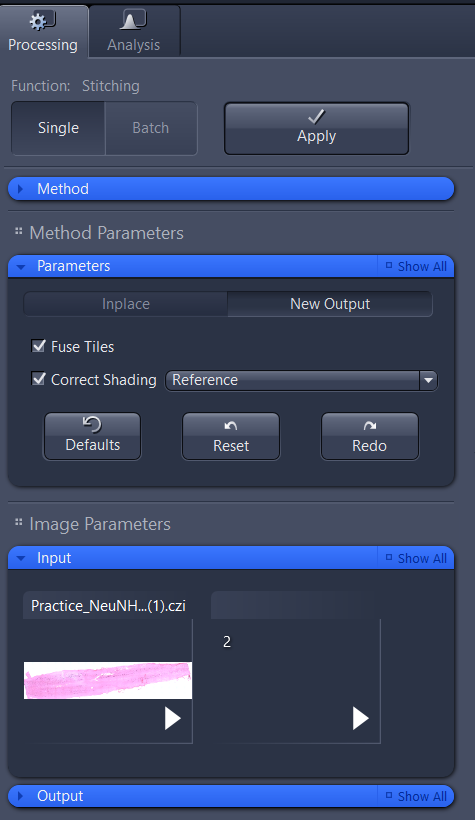
For tiled images
- Under Processing , in the Tiling tool, select the New Output Parameters button. This will keep the original image and create a new output image.
- Input the tile image for stitching.
- As a second input image select the shading correction reference image for the shading correction.
- Click on the Apply button to start the processing.
- The result is a stitched image without any shading problems.
Nikon NIS Elements
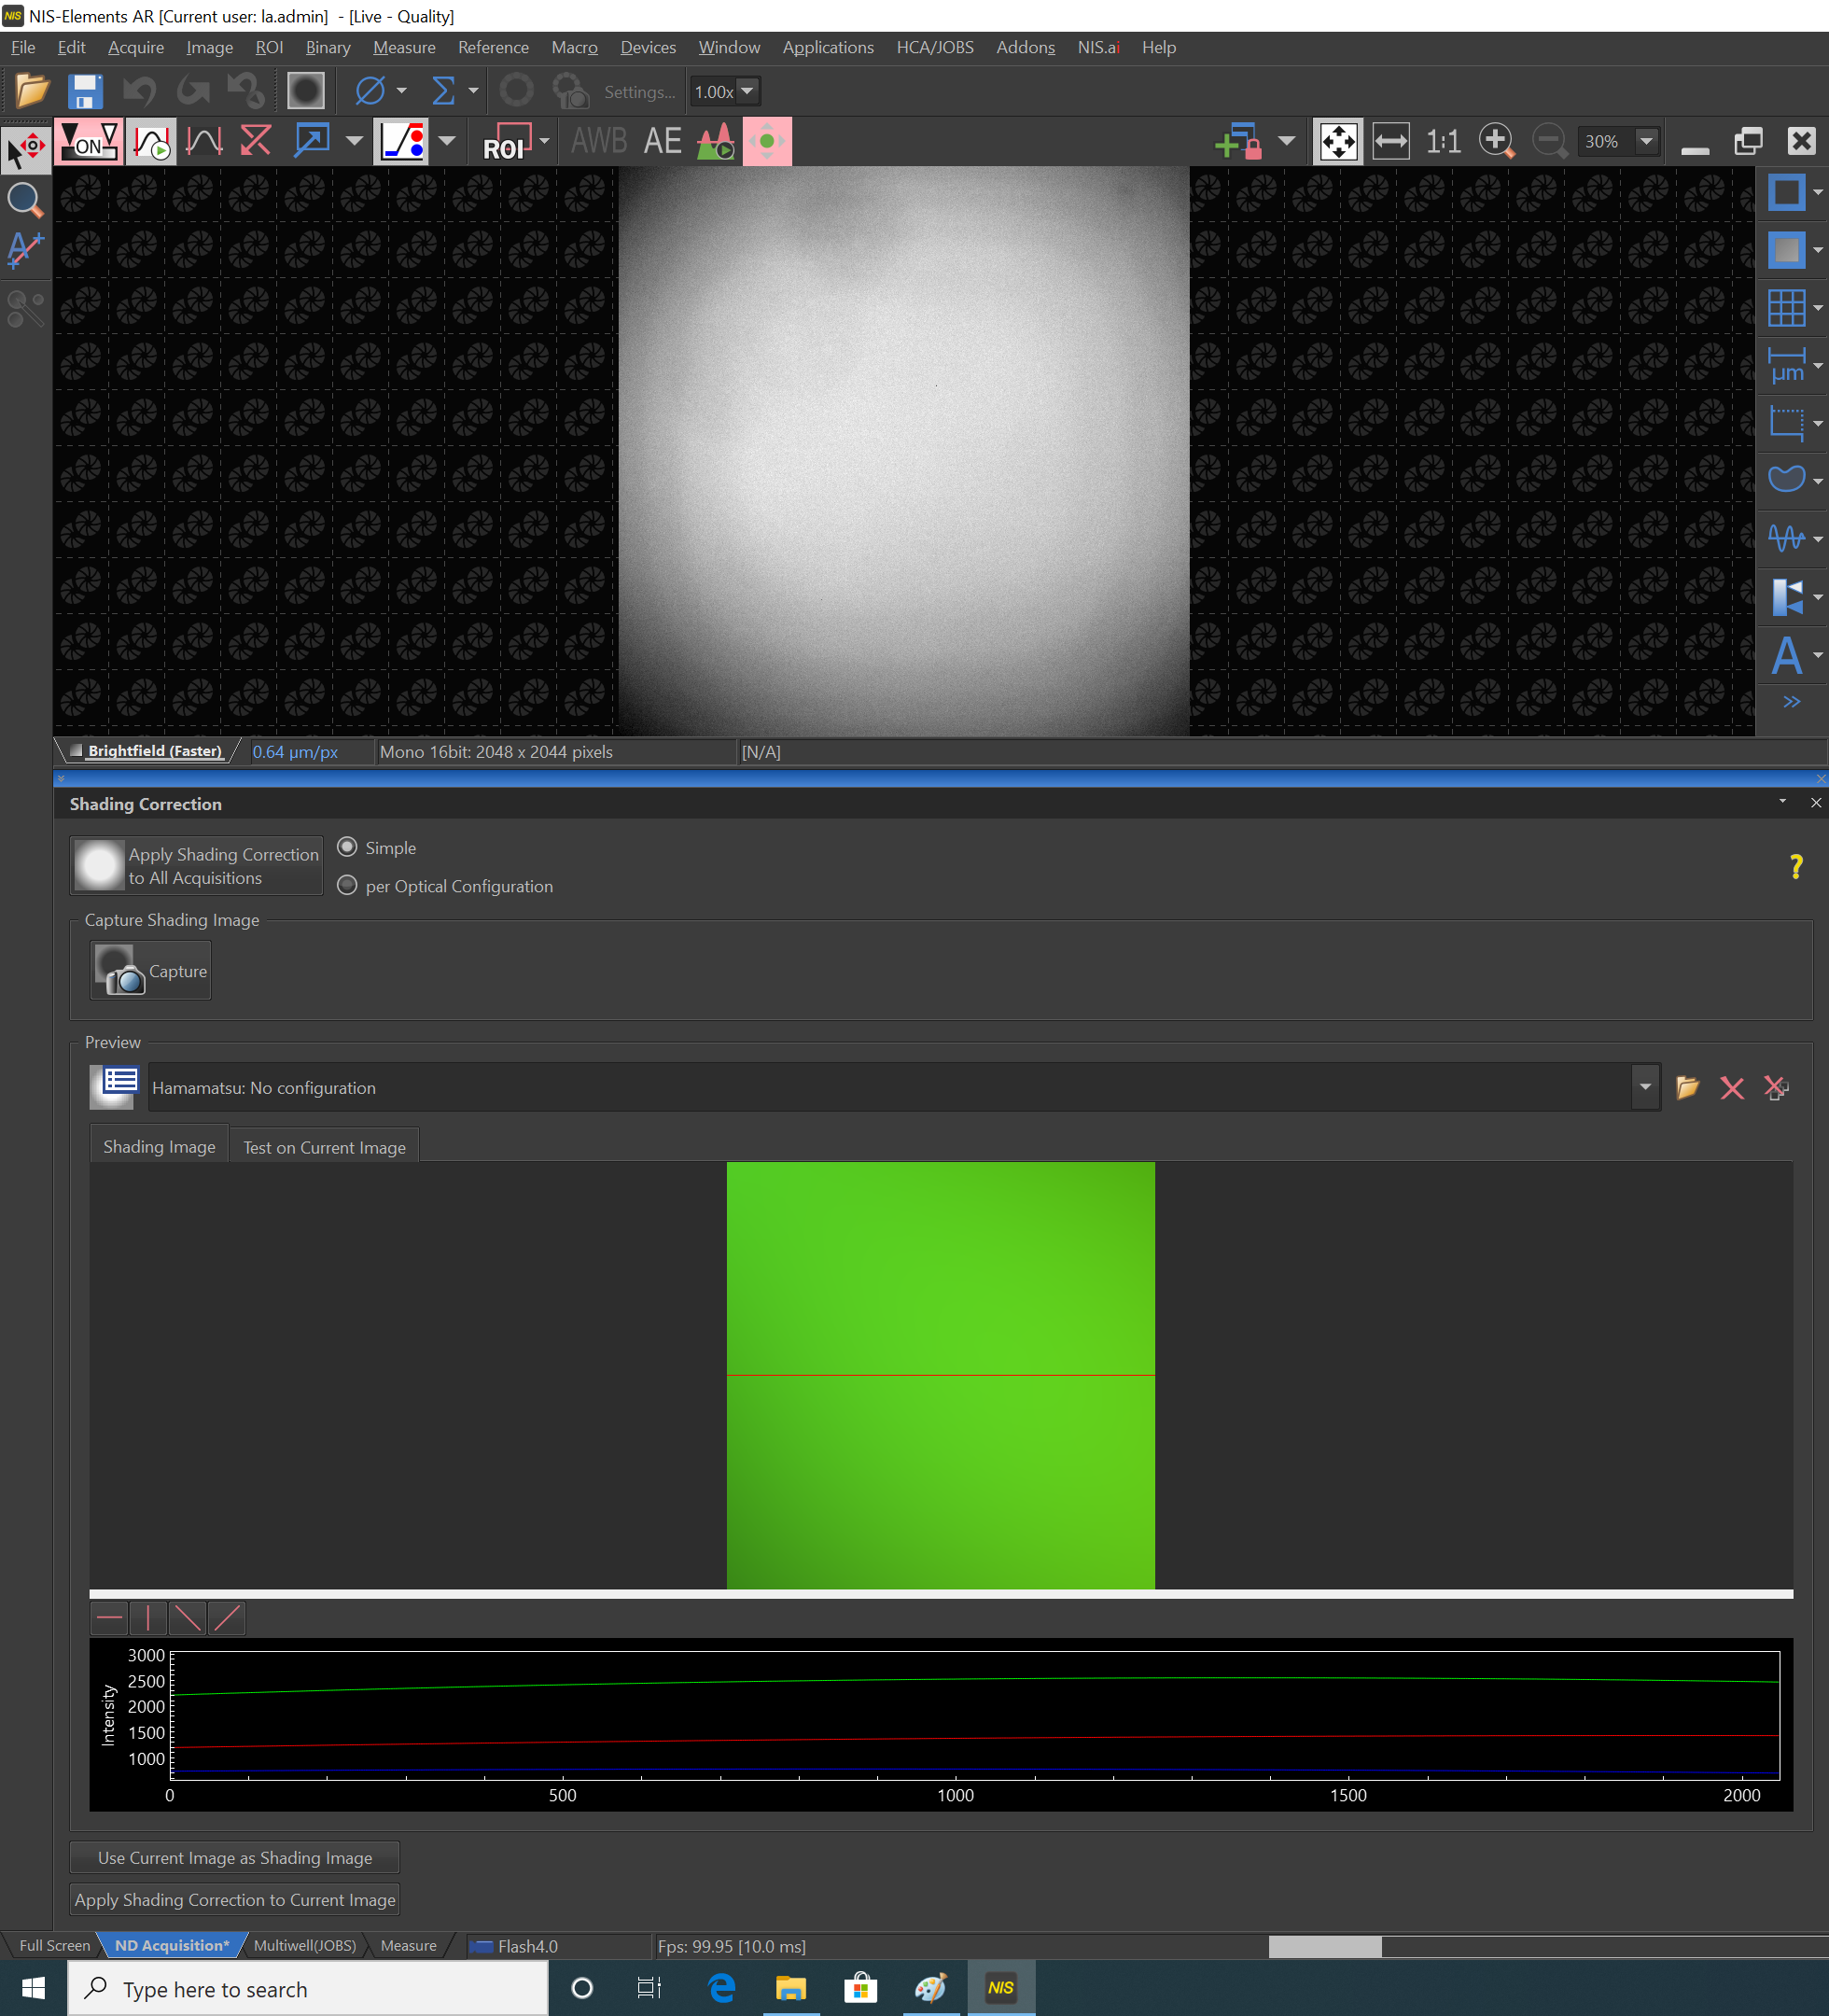
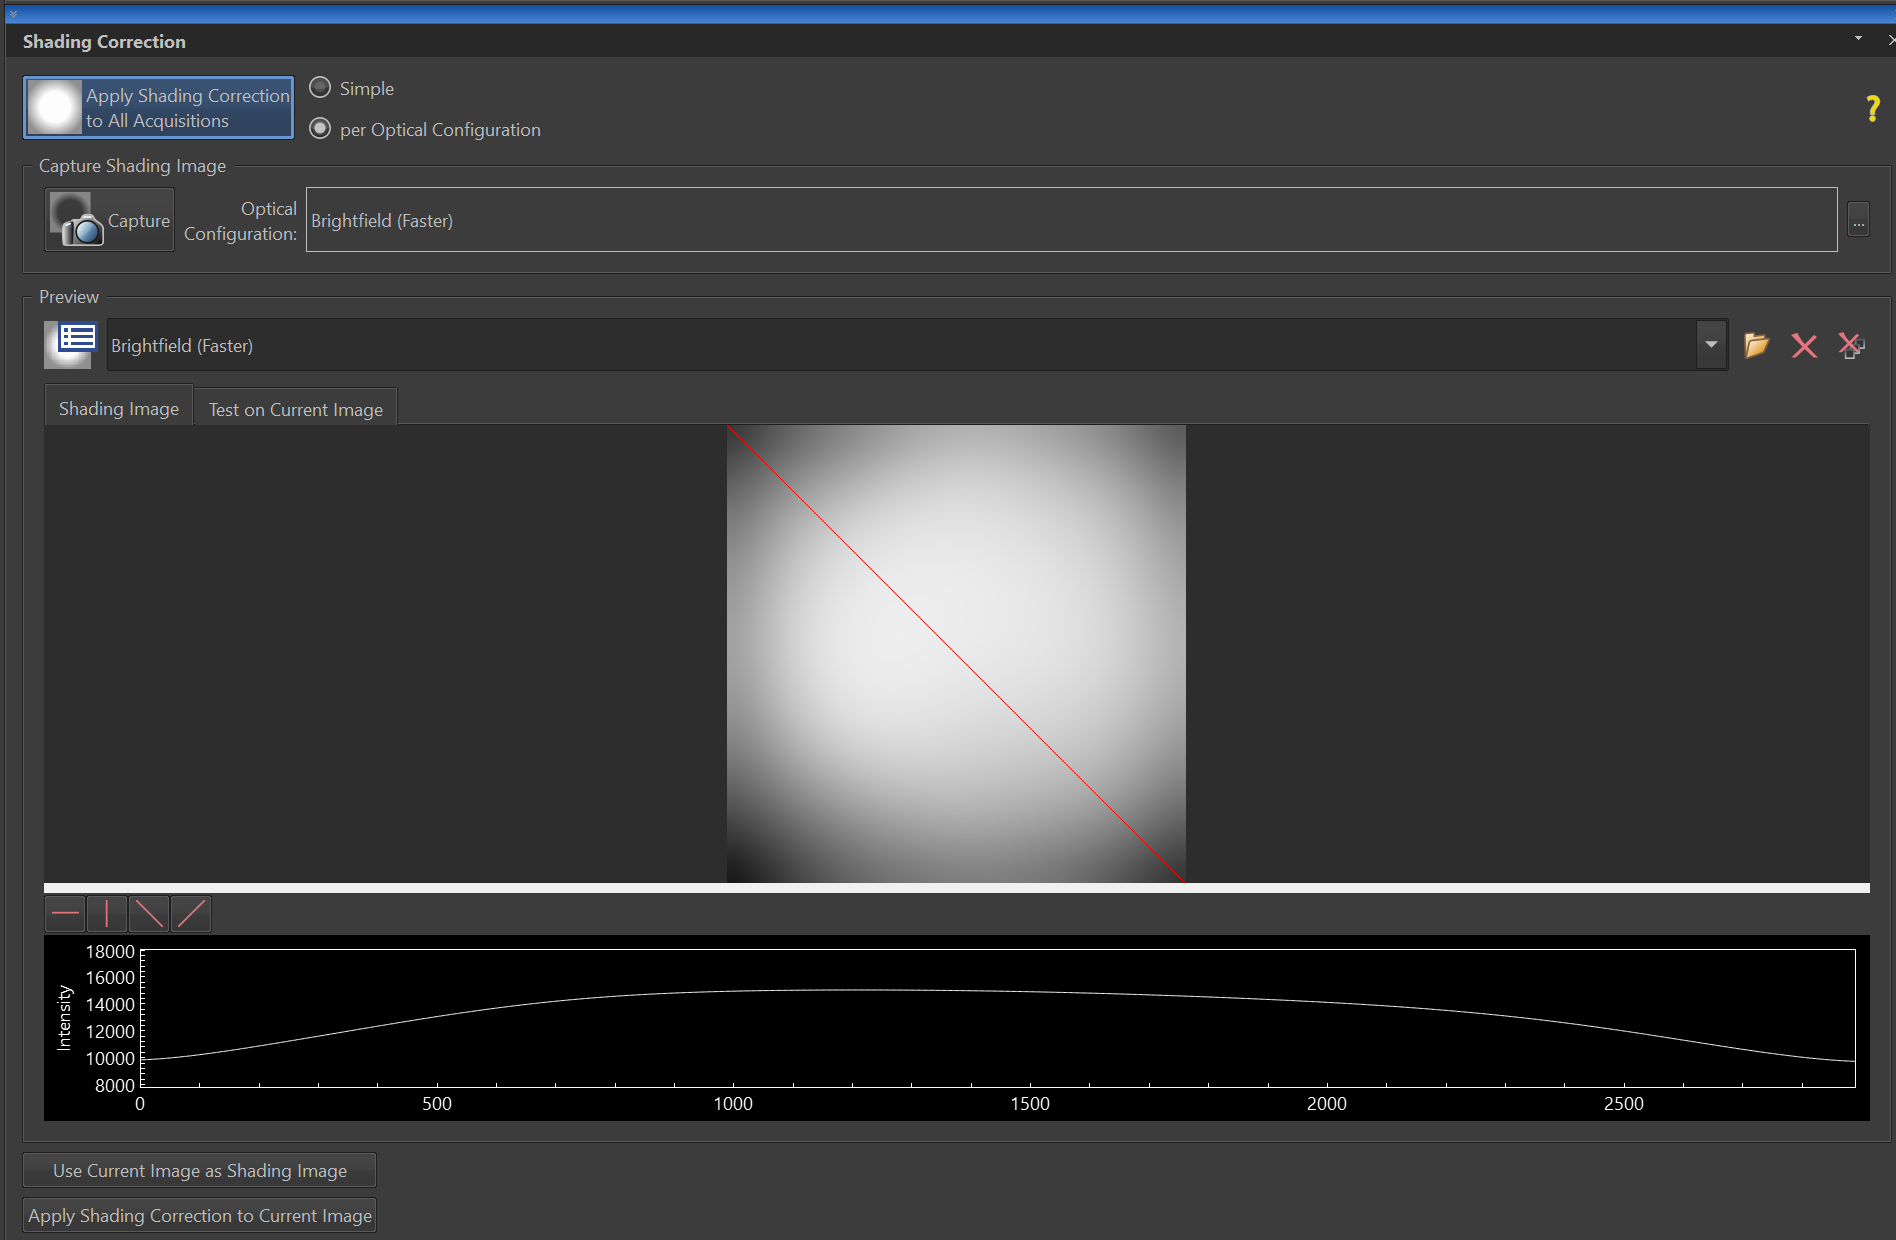
- Enable shading correction, click on the double arrows to view the shading correction window
-

- The shading correction menu will open below
-
- To do a simple shading correction, select button "simple". The capture correction popup will allow you to choose correction for brightfield, fluorescence or DIC/PhC.
-
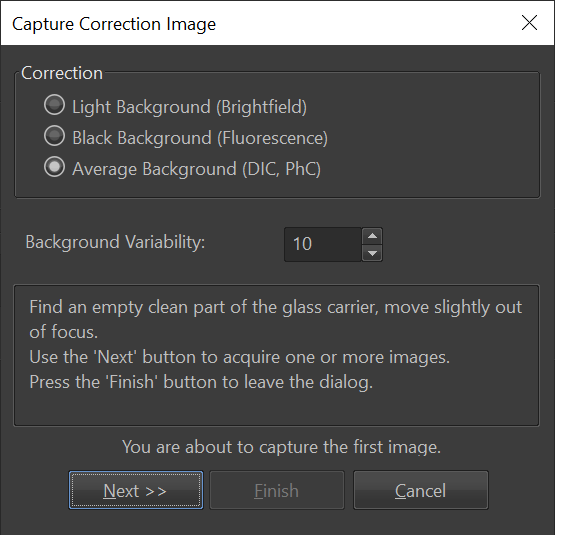
- Follow the instructions and click Next.
- Note: NIS Elements recommends you collect at least 4 images that will be averaged for shading correction. When you have collected enough images, click Finish.
- In case of “per optical configuration” shading correction, repeat this procedure for with each optical configuration.
-
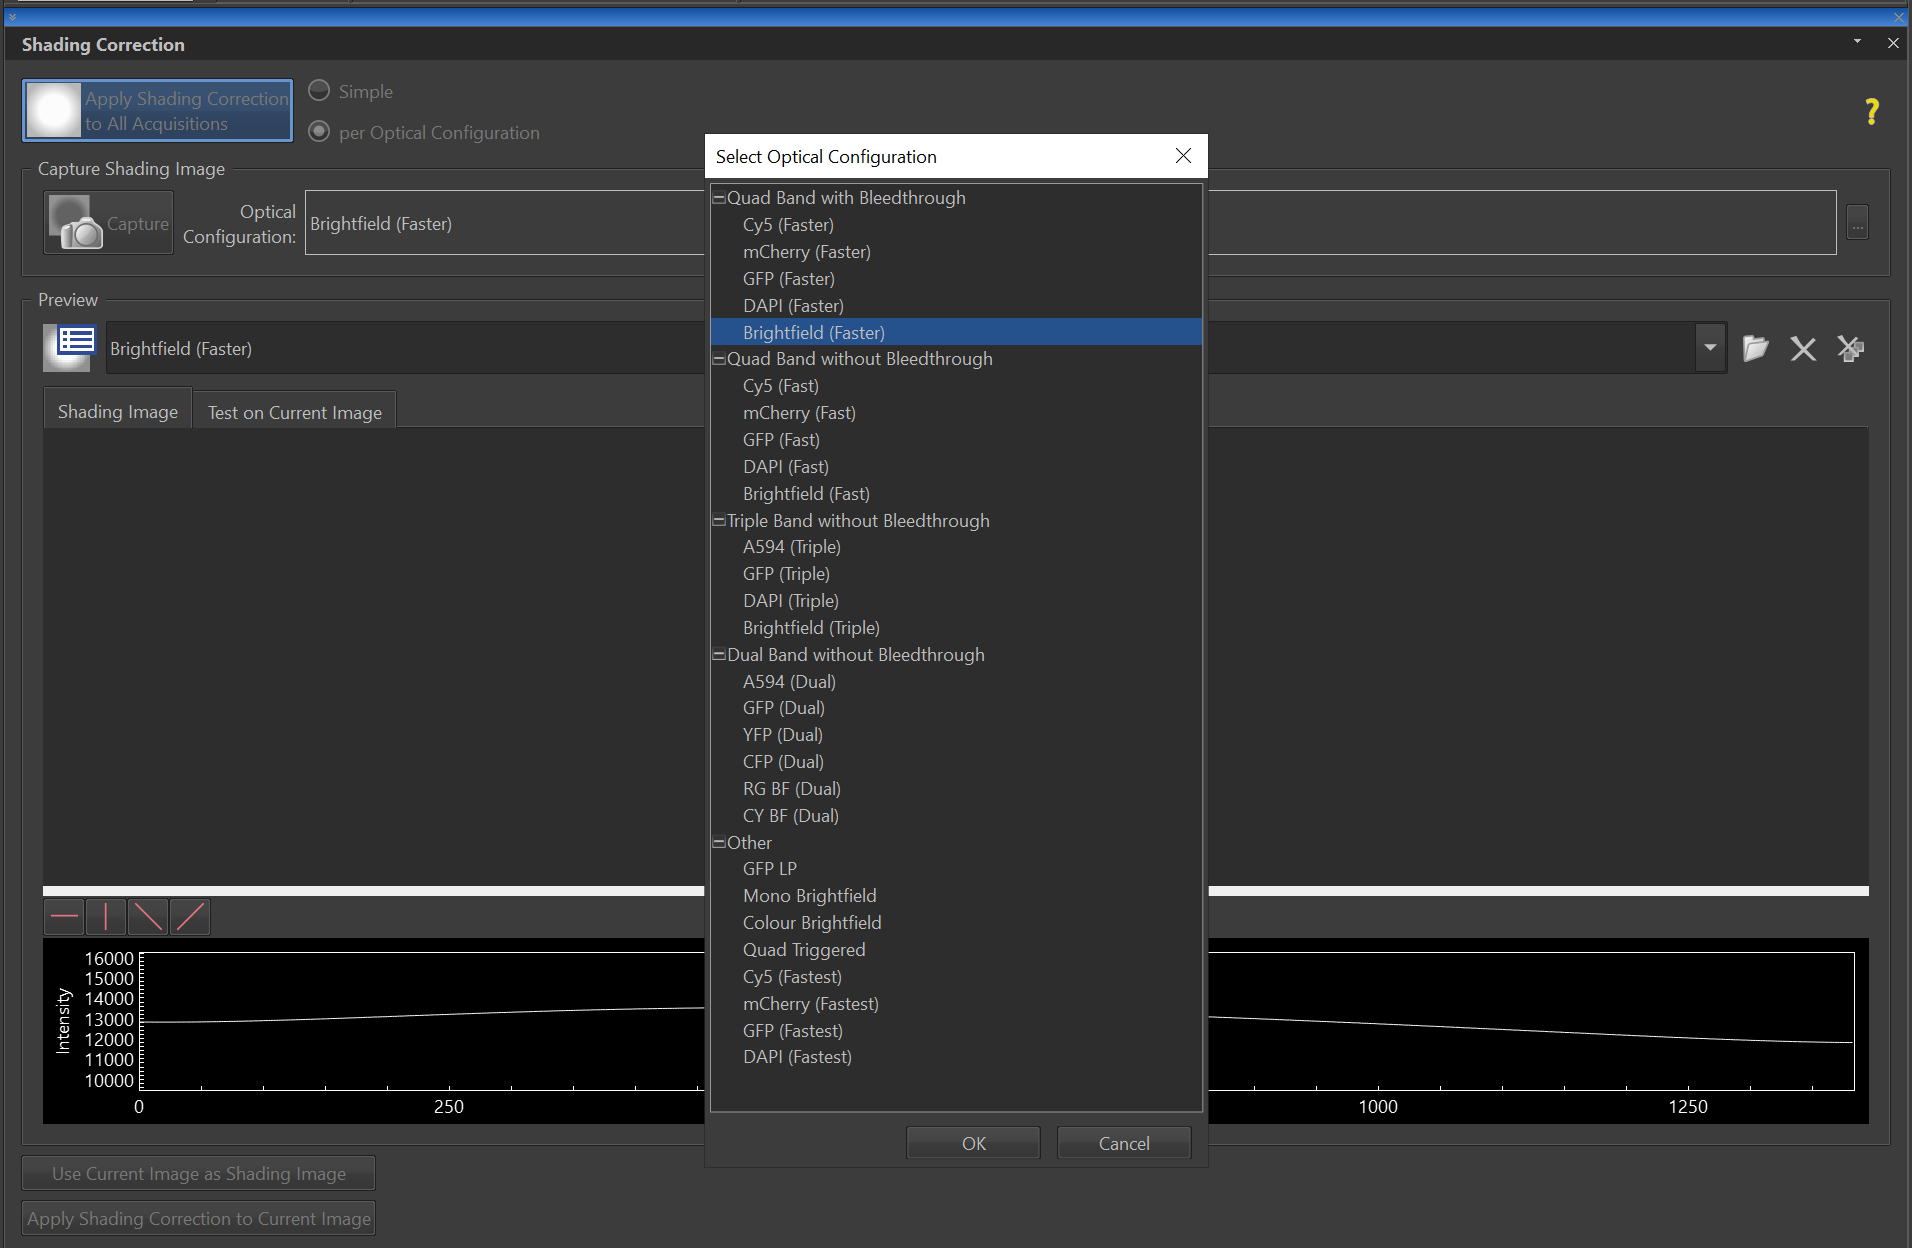
- Select Apply shading correction to current images.
- The Acquire > Shading Correction > Shading Correction is enabled if only the correction image is available for the current acquisition settings. For example, if the Shading per Optical Configuration is chosen but the correction image for the current OC has not been captured yet, the Acquire > Shading Correction > Shading Correction stays disabled.
- Toggle live shading correction on/off in the tool bar
-

Photoshop
- Open the image of the sample / tissue.
- Open the shading correction image of the empty field of view.
- Copy the image of the empty field of view and paste it on top of the sample image.
- Set the blending mode of the new empty field of view image to Divide.
- Select Menu > Layer > Flatten Image.
(From IMB microscopy quick tips, 2016)